Saturday 8 June 2013

Dropbox shell script for RaspberryPi


Let me share a useful find: Dropbox Uploader is a BASH script which can be used to upload and download files from Dropbox, an online file sharing, synchronization and backup service.
Since I am constantly switching SD card images, this is a useful tool to keep folders/files synced. I can also easily access these files on my phone/laptop then..
Setting it up is relatively easy *IF* you read the instructions. I didn’t and had to repeat the process three (3) times – shame on me :)

Remote keyboard and mouse for Raspberry Pi Over Netwrok


This is a little heads-up for those of you (includes me) that don’t want to dedicate a mouse and keyboard to their Pi and would rather use their laptop’s mouse and keyboard. This is a bit different from running remote desktop software, since what I actually want to do is to take use of my newly installed 
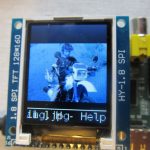
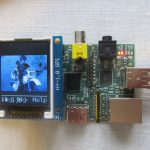
mini LCD monitor for my Pi. Another reason for this is to keep the USB ports free. Surely there are micro wireless keyboards as well such as this one offered by Adafruit but I was not in a spending mood :)
So my research ended up with installing Synergy on my Windoes 7 laptop and my Raspberry Pi. Synergy software is pretty amazing, here is what it is about:
Synergy lets you easily share your mouse and keyboard between multiple computers on your desk, and it’s Free and Open Source. Just move your mouse off the edge of one computer’s screen on to another. You can even share all of your clipboards. All you need is a network connection. Synergy is cross-platform (works on Windows, Mac OS X and Linux).
The good thing is that it is cross platform, plus it is open source. Installing it on my Windows laptop was easy. To get it on your Raspberry Pi simply use
sudo apt-get install synergy
You need to make sure it runs on startup, the Wiki on the Synergy site has some tips.
Running it is simple:
/usr/bin/synergyc --daemon YOUR_SERVER_IP
So now it acts as extended desktop, by moving the mouse all the way to the right, I can see it appear on my Raspberry Pi’s display. Even the clipboard gets transferred, so quite neat indeed.

Raspberry Pi as IP webcam


I noticed this Instructable the other day and had to try it since I had an old USB web cam laying around. I found that the instructions contained some inaccuracies, here are my steps:
sudo apt-get install motion
sudo nano /etc/motion/motion.conf

Locate and change:
Daemon = OFF to ON
webcam_localhost = ON to OFF
webcam_port = desired port number (defauls to 8081)

sudo nano /etc/default/motion
Change to 'yes':
# set to 'yes' to enable the motion daemon
start_motion_daemon=yes

sudo service motion start
The configuration file contains a number of settings to fiddle with, most are easy to understand.
IMG_1869

webcm

The port can be exposed on the firewall and all this can be viewed from external IP addresses over the web.
[update] Motion seem unreliable for my webcam, it stops working at random intervals and a deamon restart is necessary to get it back live. I am looking at mjpg-streamer now, it is much faster, but I get some scrambled images from time to time. link

Raspberry Pi and TFT Display


The most appropriate way to do so is to use Kamal’s modified kernel with ST7735R support. The 1.8″ TFT from Adafruit is the perfect display to attached to a Raspberry Pi.